

SIGN UP ON ZOOM
- Go to Zoom’s signup page. You might first be asked to enter your date of birth. (That’s because if you are younger than 16, you aren’t eligible to make a Zoom account unless it’s for school.)
- You’ll next be presented with a few options for creating an account. At the top, you can enter your email in the box labeled “Your work email address.” If you do this, move on to step two. Even though Zoom asks for a work email, a personal email should work fine.
- You can also create an account by clicking the “Sign in with SSO,” “Sign in with Google,” or “Sign in with Facebook” buttons, after which you just download the Zoom desktop app and move on to step seven.
- If you entered an email, Zoom will send an activation email to that address. Click the “Activate Account” button in the email or copy and paste the activation URL into your browser to activate your account.
- On the page that opens up in your web browser, you’ll next be asked if you’re signing up on behalf of a school. Assuming you aren’t, click the “No” button and then click “Continue.”
- On the next page, fill in your first and last name and a password
- On the next page, you can invite other people to create a free Zoom account via email. You can skip this step if you want.
- Next, you’ll be given a link to your personal meeting URL and will have the option to click an orange “Start Meeting Now” button to start a test meeting. If you copy that URL into your browser or click that orange button, you should be prompted to download the Zoom desktop app. Follow the prompts to install the app.
- After you’ve installed the Zoom app, you’ll see buttons to “Join a Meeting” or “Sign In.” To start your test meeting, click “Sign In.”
- On the next screen, enter the email and password you just used to sign up for Zoom in your browser. If you registered using the “Sign in with Google” or “Sign in with Facebook” buttons, click those buttons here and follow the prompts.

Q&A FEATURE
The Question & Answer (Q&A) feature allows attendees to ask questions during the webinar and for the panelists, co-hosts, and host to answer their questions. Answers can be provided by typing in the answers or choosing to “answer live”. With the public Q&A feature enabled, attendees can answer each other’s questions and also up-vote each other’s questions.
ZOOM CHAT
The in-meeting chat allows you to send chat messages to other users within a meeting. You can send a private message to an individual user, or you can send a message to an entire group. By clicking the Chat box on the bottom tab. As shown in the image.
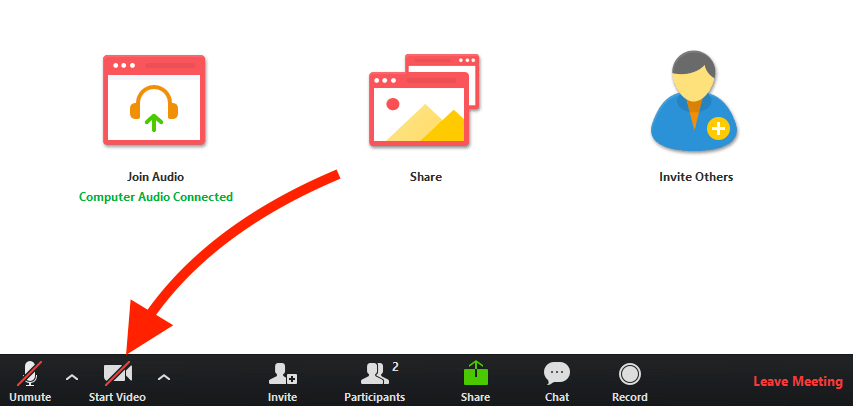
VIDEO AND AUDIO IN ZOOM
Attendees have access to these features: Mute / Unmute: Mute and unmute your microphone. Start Video / Stop Video: Turns your camera on or off. As shown in the image. Click on the up arrow next to the Audio or video icon to get a drop up options with what can be done.
ZOOM
Zoom is a cloud-based video conferencing service you can use to virtually meet with others - either by video or audio-only or both, all while conducting live chats - and it lets you record those sessions to view later. Over half of Fortune 500 companies reportedly used Zoom in 2019 and during 2020 has hit even greater heights, recently claiming 300 million daily Zoom meeting participants.
When people are talking about Zoom, you'll usually hear the following phrases: Zoom Meeting and Zoom Room. A Zoom Meeting refers to a video conferencing meeting that's hosted using Zoom. You can join these meetings via a webcam or phone. Meanwhile, a Zoom Room is the physical hardware setup that lets companies schedule and launch Zoom Meetings from their conference rooms.